
My Projects

Proper sink mounting is an absolute must for ensuring your kitchen or bathroom sinks stay in top-notch condition. Whether you've got an undermount sink, drop-in sink, dual mount sink, or farmhouse sink, securely mounting it is vital to prevent any mishaps, leaks, or damage to your countertops. That's where sink mounting clips come into action. These small yet robust metal pieces do the heavy lifting, keeping your sink locked in and steady.
Sink mounting clips come in all shapes and sizes, specially designed to match different sink styles like a charm. We'll provide how to figure out the right number of clips you need for your sink, based on its size, weight, and materials.
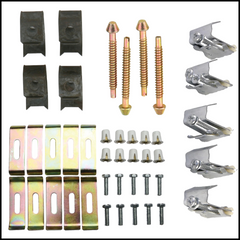
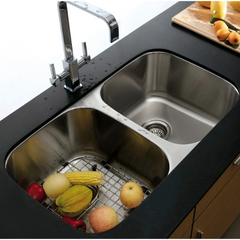
Undermount Sink Clips: You've got "L"-shaped brackets and "U"-shaped brackets to choose from—both the "L" ones and the "U" ones hug the top edges of the sink and tighten against the countertop. Both types are built for a stable and sag-free fit.
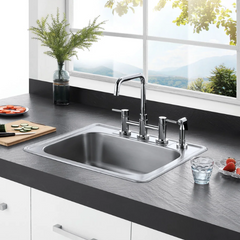
Drop-In/ Surface Mount/ Top Mount/ Self-Rimming Sink Clips: With these, you drop the sink into a cutout in the countertop, and they flaunt a rim resting on the countertop surface. These smart brackets hook under the sink's rim and keep the sink in place when tightened against the countertop. Some even boast rubber gaskets for a watertight seal.
Dual Mount Sink Clips: Offering the best of both worlds— undermount and drop-in installations. These chameleons come with adjustable sink clips, ready to handle whatever setup you fancy. The brackets adapt to either undermount or drop-in sinks ensuring a solid fit.
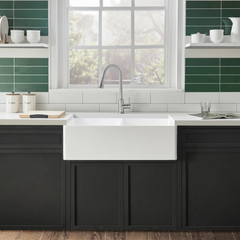
Apron Front/ Farmhouse Sink Clips: They are usually longer in length and reinforce the sink's exposed front.
How many clips you'll need depends on several factors—sink type, size, material, and mounting method. The bigger and heavier the sink, the more clips it'll crave to get the support it deserves. Plus, the material matters too—whether it's cast iron, stainless steel, porcelain, or something else, the weight and distribution will play a role in the clip count.
However, remember that for undermount sinks, you'll want enough clips to defy gravity and keep the sink flush with the countertop. On the other hand, drop-in sinks need clips to hold their rim tight against the countertop, preventing unwanted movement.
A sink may come with sink mounting hardware already included. Typically there are 10 sink mounting clips to go with. It is best to use about 4-6 sink clips to support the entire perimeter of the sink. Four clips at each corner and one at each middle section is a good placement for up to 6 clips. If your sink has the space and you don’t mind using up the remainder of provided clips, place them as evenly as possible around the sink and secure.
Step 1: Mark Sink Clip Placement
- Place the sink upside down on the countertop and align it in the desired position.
- Use a pencil or marker to mark the positions where the sink clips will be installed. Six clips are commonly used for a typical undermount sink – two along each side and two at the front and back.
Step 2: Drill Pilot Holes
- Carefully drill pilot holes at the marked positions using a drill bit slightly smaller than the screw diameter.
- Ensure that the pilot holes are straight and level to facilitate easy installation of the clips.
Step 3: Secure Sink Clips to Countertop
- Place the sink clips into the pilot holes and fasten them tightly to the countertop using screws.
- Ensure the clips are snug against the countertop to properly support the sink.
Step 4: Lower the Sink in Place
- With the clips securely attached, carefully lower the sink into the cutout on the countertop.
- Ensure the sink properly aligns with the countertop edges and sits evenly on the clips.
Step 5: Tighten Sink Clips
- Once the sink is in place, gently tighten the clips to ensure a snug fit between the sink and the countertop.
- Adjust the clips as needed to level the sink and eliminate any gaps between the sink and the countertop.
Step 1: Positioning the Sink on the Countertop
- Carefully position the drop-in sink into the cutout on the countertop, ensuring that it sits evenly on all sides.
Step 2: Installing Clips to Secure the Sink
- Underneath the sink, attach the drop-in sink clips to the rim using screws or brackets, as per the manufacturer's instructions.
- Place the clips at regular intervals along the sink's rim, ensuring even support around the entire perimeter.
The installation process for dual mount sinks involves choosing the mounting type (undermount or drop-in) and following the respective steps mentioned above, depending on the selected method.
Step 1: Mark Clip Positions
- Position the farmhouse sink on the cabinet, ensuring the front apron extends slightly beyond the front.
- Mark the positions on the cabinet where the sink clips will be attached to support the front apron.
Step 2: Install Front Apron Clips
- Secure the farmhouse sink clips onto the cabinet at the marked positions using screws or brackets.
- Make sure the clips provide adequate support for the weight of the front apron.
Step 3: Lower the Sink in Place
- Carefully lower the farmhouse sink into the cutout on the countertop, ensuring that the front apron rests securely on the clips.
Step 4: Secure the Sink to Countertop
- Underneath the sink, attach additional clips to the countertop as required for proper support.
- Ensure that the sink sits evenly on the countertop and is firmly secured.
To avoid these mistakes, consider the following:
